
Apps
Install third-party apps from the Marketplace — analytics, marketing, forms, and more — and inject your own custom scripts.
Blox provides a built-in integration suite to inject tracking codes, analytics engines, ad pixels, chat widgets, and custom scripts into your website without editing code templates directly.
Overview
Select the Apps tab in your site's management sidebar. The panel has two parts:
- Apps: third-party tools you install from the App Marketplace (Google Tag Manager, Google Analytics, Meta Pixel, and more) and configure per site.
- Custom Scripts: raw
<script>tags you paste in yourself, injected into the page<head>or right before</body>.
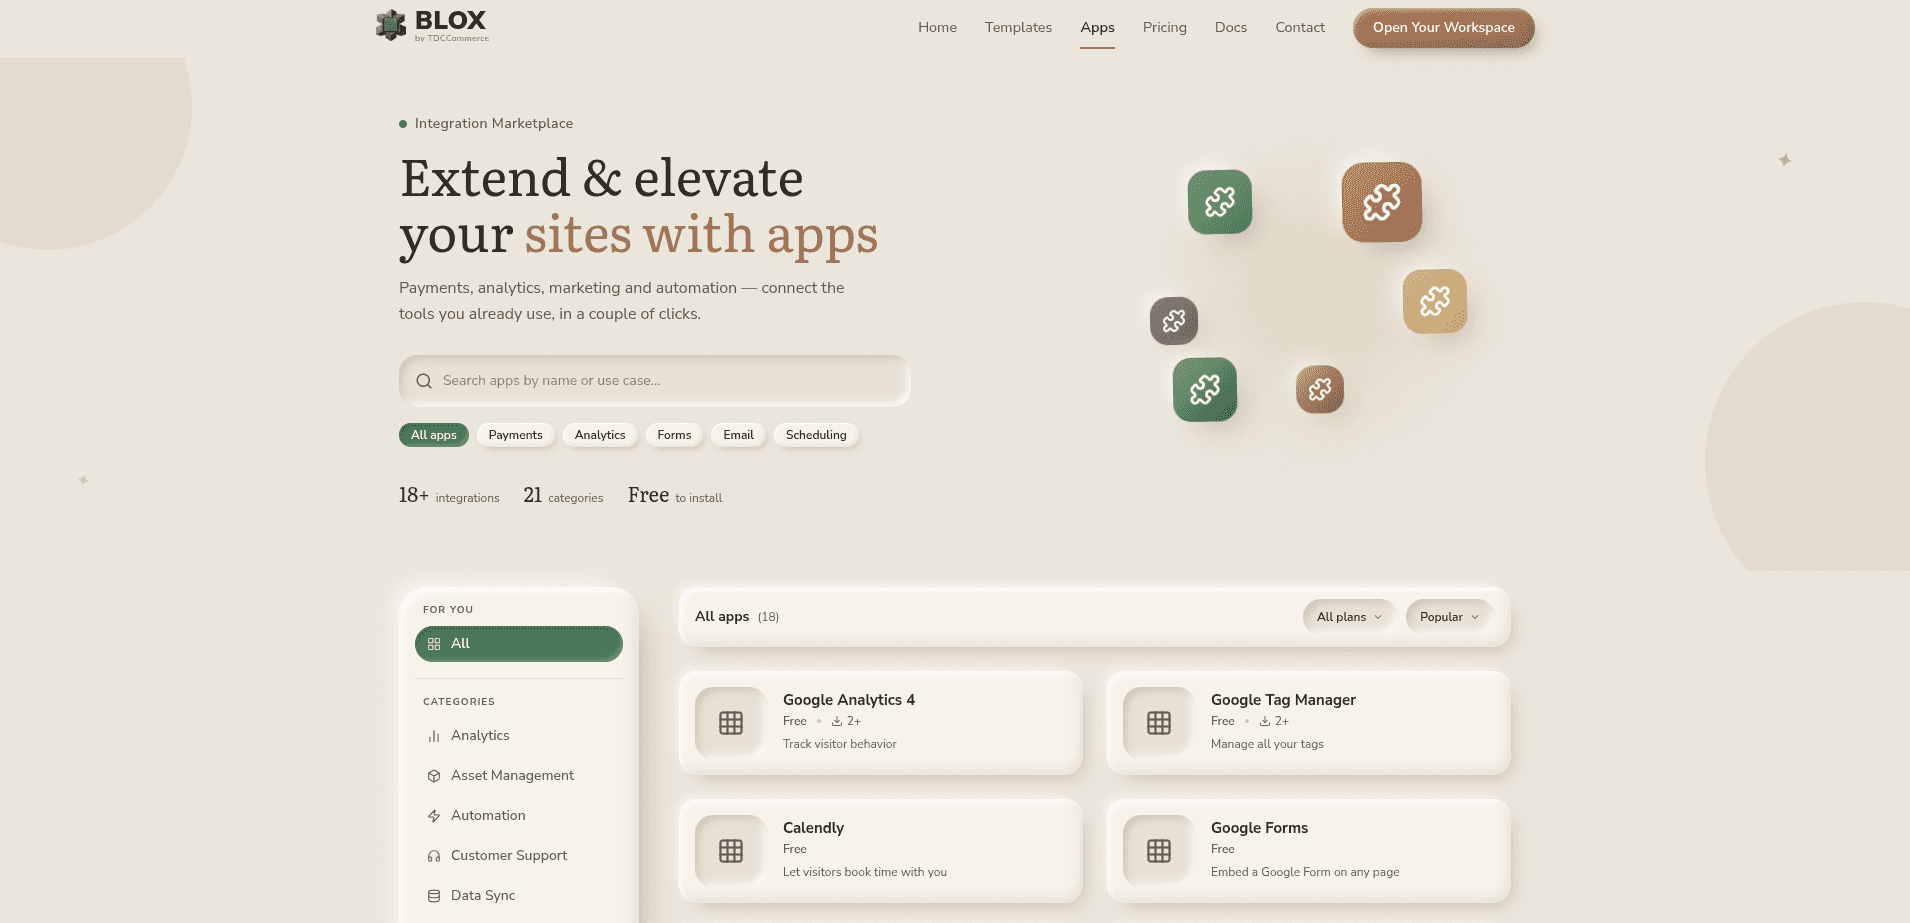
If you haven't installed anything yet, the panel shows an empty state suggesting apps like Google Tag Manager, Google Analytics, Meta Pixel, Google Reviews, and Calendly — click Browse Apps to get started.
Installing an App
Apps live in a shared Marketplace and must be installed before they show up on this tab:
Click Browse Apps in the top right of the Apps panel (or Marketplace → Apps in the top navigation) to open the App Marketplace.
Browse or filter by category — Analytics, Marketing, Forms and Surveys, Ecommerce, and more — then open an app to view its details.
Click Install, then choose where: check individual sites, or check the workspace checkbox to install it across your entire workspace at once. Click Authorize & Install to confirm.
Return to this site's Apps tab. The app now appears as a card here, ready to configure.
Installing an app "workspace-wide" creates a single shared configuration used by every site in the workspace. If a site also has its own site-specific install of the same app, that site's own configuration takes priority over the workspace-wide one for that site.
Configuring an Installed App
Each installed app renders as its own card on the Apps tab:
- A Workspace-wide badge appears if the app was installed for the entire workspace rather than just this site.
- A Needs setup badge appears until every required field for that app has been filled in and saved.
- View app details opens the app's Marketplace listing page.
- Fill in the app's fields — e.g. Google Tag Manager's Container ID, formatted
GTM-XXXXXXX— and click Save on that card. Save only activates once you've changed something. - Remove deletes the app from this card. Click once to arm it, click again to confirm.
Removing a Workspace-wide app removes it for every site in the workspace, not just the one you're viewing, since all of those sites share that single configuration. Removing a site-specific install only affects this site.
Popular Apps
A few of the built-in Marketplace apps available today:
| App | Category | What you configure |
|---|---|---|
| Google Tag Manager | Analytics | Container ID (GTM-XXXXXXX) |
| Google Analytics 4 | Analytics | Measurement ID (G-XXXXXXXXXX) |
| Meta Pixel | Analytics, Marketing | Pixel ID (15–16 digit number) |
| Microsoft Clarity | Analytics | Project ID |
| PostHog | Analytics | Project API Key, Instance URL |
| Hotjar | Analytics | Site ID |
| QookieQloud Cookie Consent | Compliance | Site Key (qq_pk_…) |
| Google Reviews | Marketing | Google Place ID |
| Calendly | Scheduling | Your Calendly URL |
| Mailchimp / HubSpot Forms / Zendesk | Forms & Support | Connect to sync form submissions or power a chat widget |
Google Reviews and Calendly don't inject a site-wide script. Once installed, add their block from the page editor's block library wherever you want the reviews carousel or booking widget to appear on a page.
Cookie Consent
QookieQloud Cookie Consent shows a cookie banner on your published site and records each visitor's choice.
- Install it on each site separately — a Site Key only works on the domain you registered in QookieQloud. The app's card shows which domain to register.
- Once its Site Key is saved, QookieQloud's banner replaces your site's own Visitor consent bar. Visitors see one banner.
- Every app and script that needs consent waits for the visitor's choice in QookieQloud's banner, using the same categories as the table below: Statistics allows Analytics, Marketing allows Marketing, and Functional allows Functional. That covers Google Analytics 4, Google Tag Manager, Meta Pixel, Microsoft Clarity, PostHog, Hotjar, Zendesk chat, other app embeds, and custom scripts not marked Necessary.
- Google Analytics 4 and Google Tag Manager also start with Google consent denied and update when the visitor chooses.
- If a visitor later withdraws consent, scripts that already loaded stay until they open another page.
- Remove QookieQloud and your own consent banner comes back as you designed it.
Custom Scripts
For anything the Marketplace doesn't cover yet — chat widgets, custom pixels, other cookie banners, or your own embeds — paste a script directly:
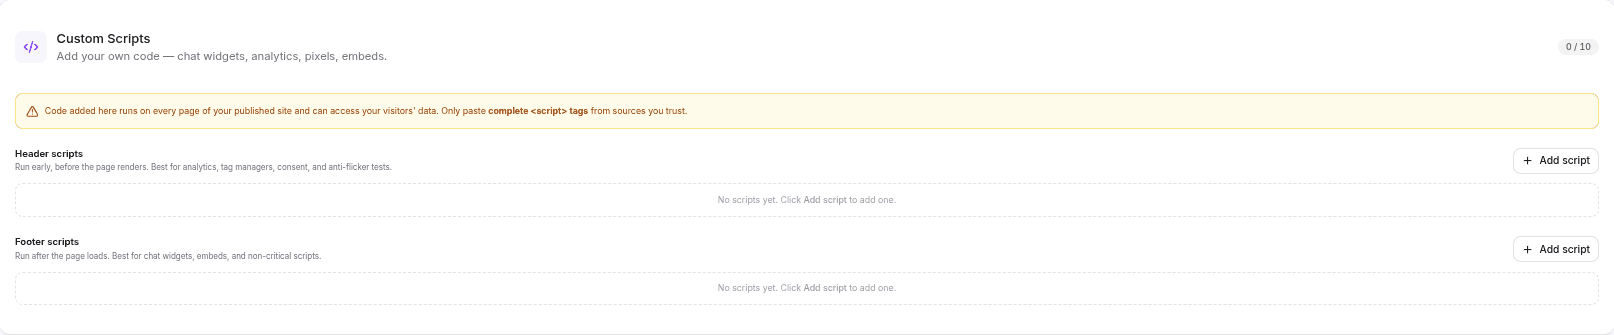
- Header scripts: run early, before the page renders — best for analytics, tag managers, consent managers, and anti-flicker tests. Set style overrides and a third-party consent manager to Necessary so they load without waiting for the consent bar.
- Footer scripts: run after the page loads — best for chat widgets, embeds, and other non-critical scripts.
Click Add script under either section to add an entry, then give it an optional name and paste the complete <script> tag (e.g. <script src="..."> or <script>...</script>) into the code box. Remove any entry with its trash icon.
Code added here runs on every page of your published site and can access your visitors' data. Only paste complete <script> tags from sources you trust.
Click Save Scripts & Consent, at the top right of the panel, to persist your changes — this is a separate save action from each app card's own Save button.
Quota & Plan Limits
- The number of custom scripts you can save is shown as a badge (e.g.
0 / 10) and depends on your plan. - Once you're at your limit, the Add script buttons disable and an upgrade prompt appears.
- If your plan changes to one below the required tier, existing scripts are kept in a read-only list — they stop being injected into your pages until you remove enough to fit your new limit, or upgrade again.
Visitor Consent
The consent bar is on by default. When your site has at least one script that isn't strictly necessary, your published site shows a cookie bar at the bottom of the page with Reject all, Customize, and Accept all buttons. A small Cookies button lets visitors reopen their choices later. Their choice is remembered for 180 days, and scripts in a category don't load at all until the visitor allows it.
Each script belongs to one of four categories:
| Category | What it covers | Loads |
|---|---|---|
| Necessary | Scripts the site needs to work | Always, with no bar |
| Analytics | Google Analytics 4, Microsoft Clarity, PostHog, Hotjar, and other app embeds | After the visitor allows Analytics |
| Marketing | Google Tag Manager, Meta Pixel, Mailchimp site script | After the visitor allows Marketing |
| Functional | Zendesk chat | After the visitor allows Functional |
Google Tag Manager counts as Marketing because a container can load ads.
For custom scripts, pick a Consent category on each entry. New scripts default to Analytics, and scripts saved before categories existed are treated as Analytics, except that existing style, link, meta, and structured-data-only entries were set to Necessary automatically. Mark a script Necessary if it must load without waiting for the visitor, and the bar only appears when something else needs consent.
The banner is a Cookie consent section, designed in the editor. Click Design banner on the Visitor consent card, then choose a design (Classic, Card, Pill or Privacy Center) and its position, and set the wording, policy links, buttons and reopen icon. Every site starts with the Classic bottom banner. Banner changes go live when you publish the site.
If you hide both Reject and Customize, the close (×) button stays on, so visitors can always decline.
Google Reviews, Calendly, and form reCAPTCHA aren't controlled by the cookie bar.
Custom scripts that already ran on every visit will now wait for Analytics consent. Mark a script Necessary to keep the old always-on behavior. You remain responsible for the scripts you add and for the consent your visitors need to give.
Turning the bar off
The switch on the Visitor consent card turns the bar off. With it off, no bar appears and every script loads for every visitor straight away, whatever its category. Asking for consent is then up to you, for example with another consent manager. Click Save Scripts & Consent to apply.
While QookieQloud is set up, the card shows Handled by QookieQloud instead: its banner asks, and every script waits for that choice whatever this switch was set to.
Going Live
Unlike page edits, changes here don't wait for a Publish step:
- Save Scripts & Consent takes effect on your published site immediately.
- Saving or removing an app's configuration takes effect automatically, typically within about a minute.
Related
- Forms — Connect the Mailchimp, HubSpot Forms, or Zendesk apps here so form submissions can sync out.
- Feature Access — Which plan tier unlocks the App Marketplace and Custom Scripts.
- Webhooks — Another way to react to events on your site programmatically, alongside installed apps.
- App Marketplace — Browsing categories, app details, and starting an install from the Marketplace itself.