
Collections (CMS)
Create structured data models, manage content entries, and bind database items to page editor layouts.
Blox includes a built-in headless Content Management System (CMS) called Collections. Instead of hardcoding content, you can define a structured database schema (e.g., for team members, pricing tiers, FAQs, or reviews), add data records, and bind them dynamically to visual layout blocks in the Page Editor.
Overview
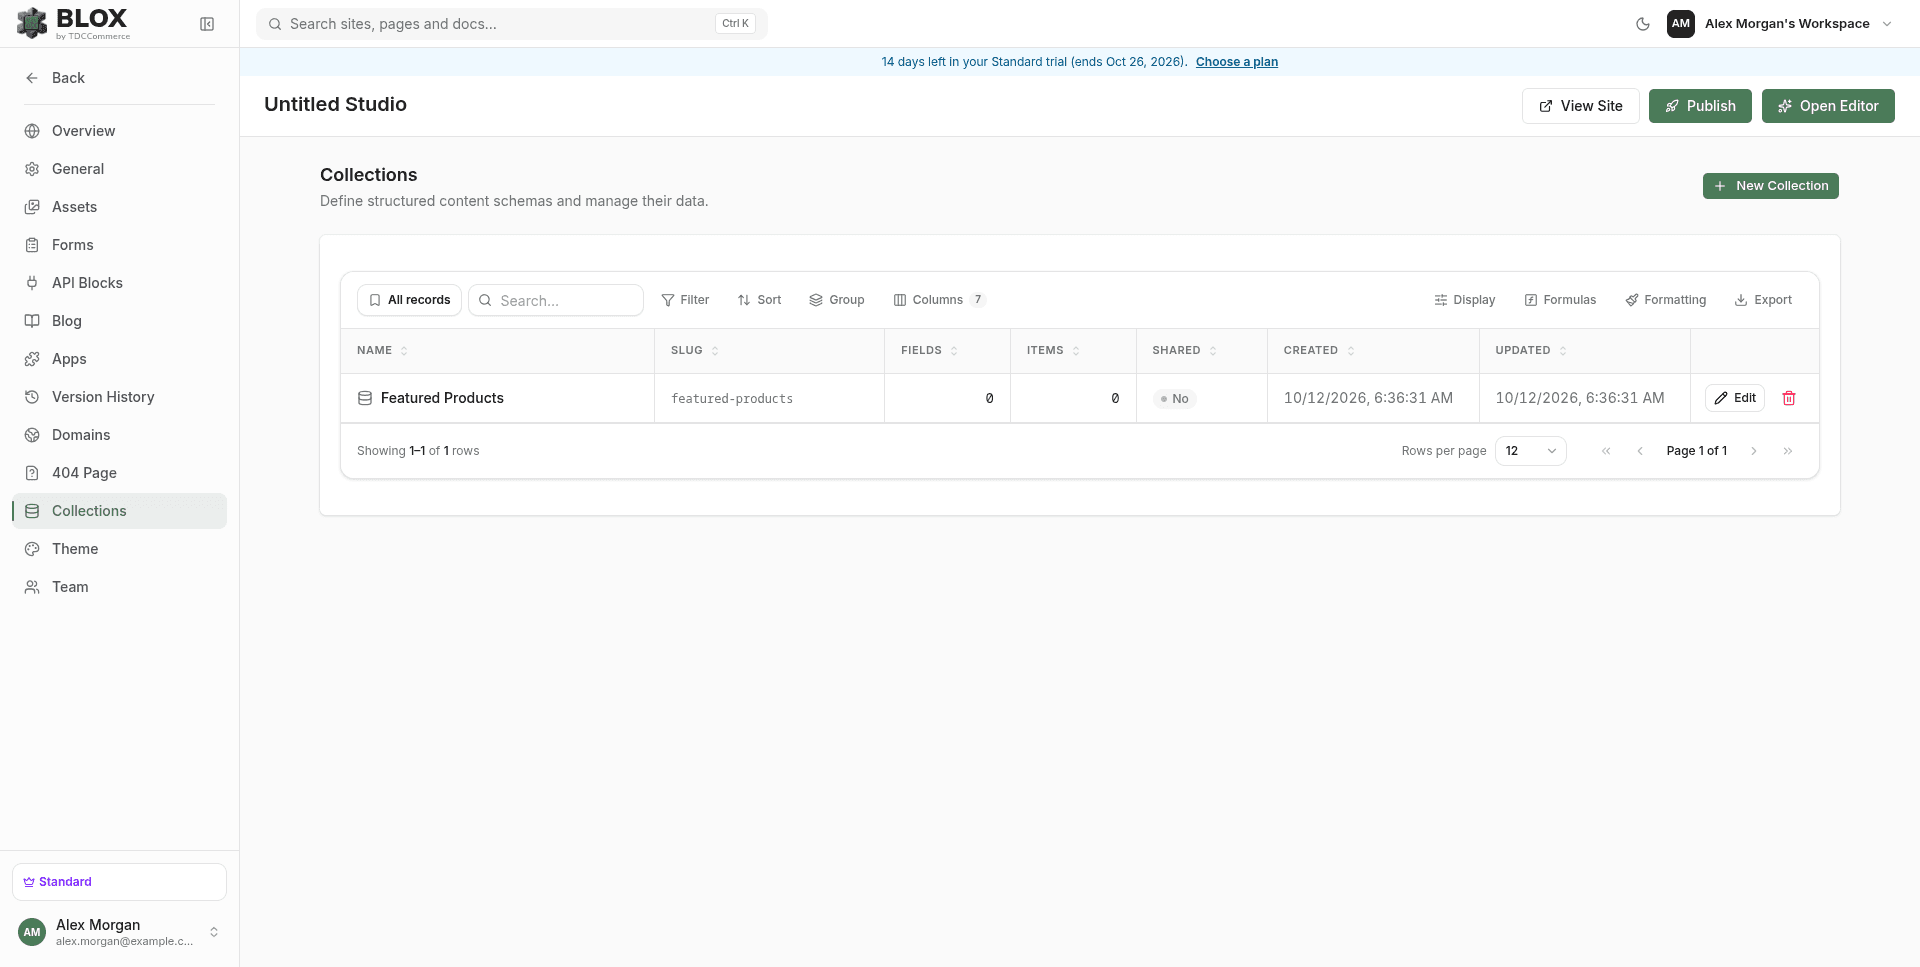
Access the CMS dashboard by selecting the Collections tab in the left sidebar of your Site Management page. The list table displays:
- Collection Name: The label of your structured collection.
- Slug: The URL-friendly identifier used for API operations and editor queries.
- Fields: The number of fields defined in the schema.
- Items: The total number of content records added.
- Actions: Edit (or View, if your role only has read access) to open the schema/content editor, and a trash icon to delete the collection.
A search box (matching name or slug) and pagination sit above the table once you have more collections than fit on one page.
Collections aren't restricted to any plan tier — every plan can use them. What varies by plan is a quota on how many collections your workspace can have and how many items each collection can hold. See Feature Access for current limits.
Deleting a collection is permanent — it removes the schema and every item in it. The confirmation dialog spells out exactly how many items will be lost.
Creating & Defining a Collection Schema
To create a new content model:
Click New Collection in the top-right corner of the Collections panel.
Enter a name (e.g., Team Members or FAQs) and click Create. This automatically generates a unique slug and opens the Collection Editor.
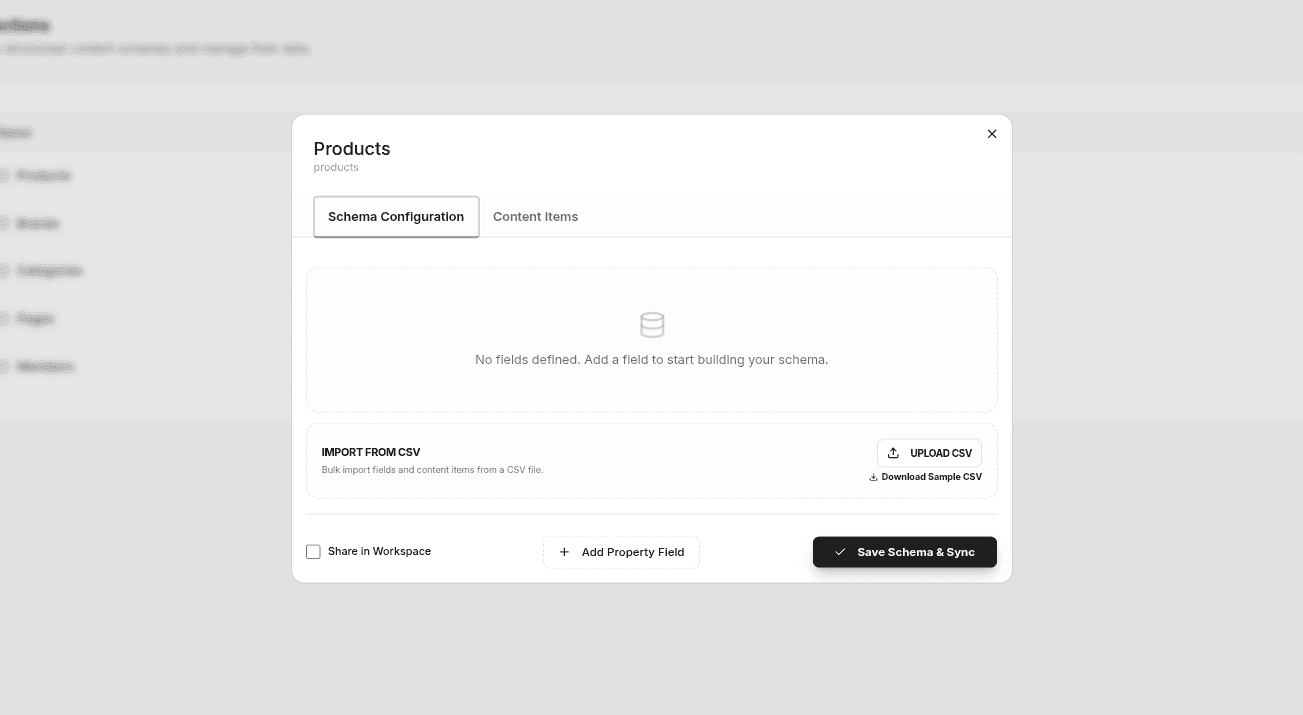
In the Schema Configuration tab, click Add Property Field to define your data model structure.
Supported Field Types
Each field in your schema requires a Field Name (for the UI) and an API Key (shown prefixed with #, used to reference the value when binding editor blocks). Select from these types:
| Field Type | Input Control | Best Used For |
|---|---|---|
| Text | Single-line input | Titles, names, role headers, phone numbers. |
| Rich Text | Textarea block | Descriptions, formatted body text, lists. |
| Image URL | Asset Library picker | Headshots, product photos, graphics, company logos. |
| Link URL | Link address input | Button targets, external references, social profiles. |
| Color | Color picker box | Accent color settings, background overrides. |
| Number | Numeric entry box | Pricing, counters, ratings, custom sorting weights. |
API Keys aren't checked for uniqueness — nothing stops you from giving two fields the same key. Keep them distinct yourself, since a duplicate key makes it ambiguous which field a bound block is reading from.
Organizing Schema Fields
- Deleting Fields: Click the trash icon next to a field to remove it from the schema.
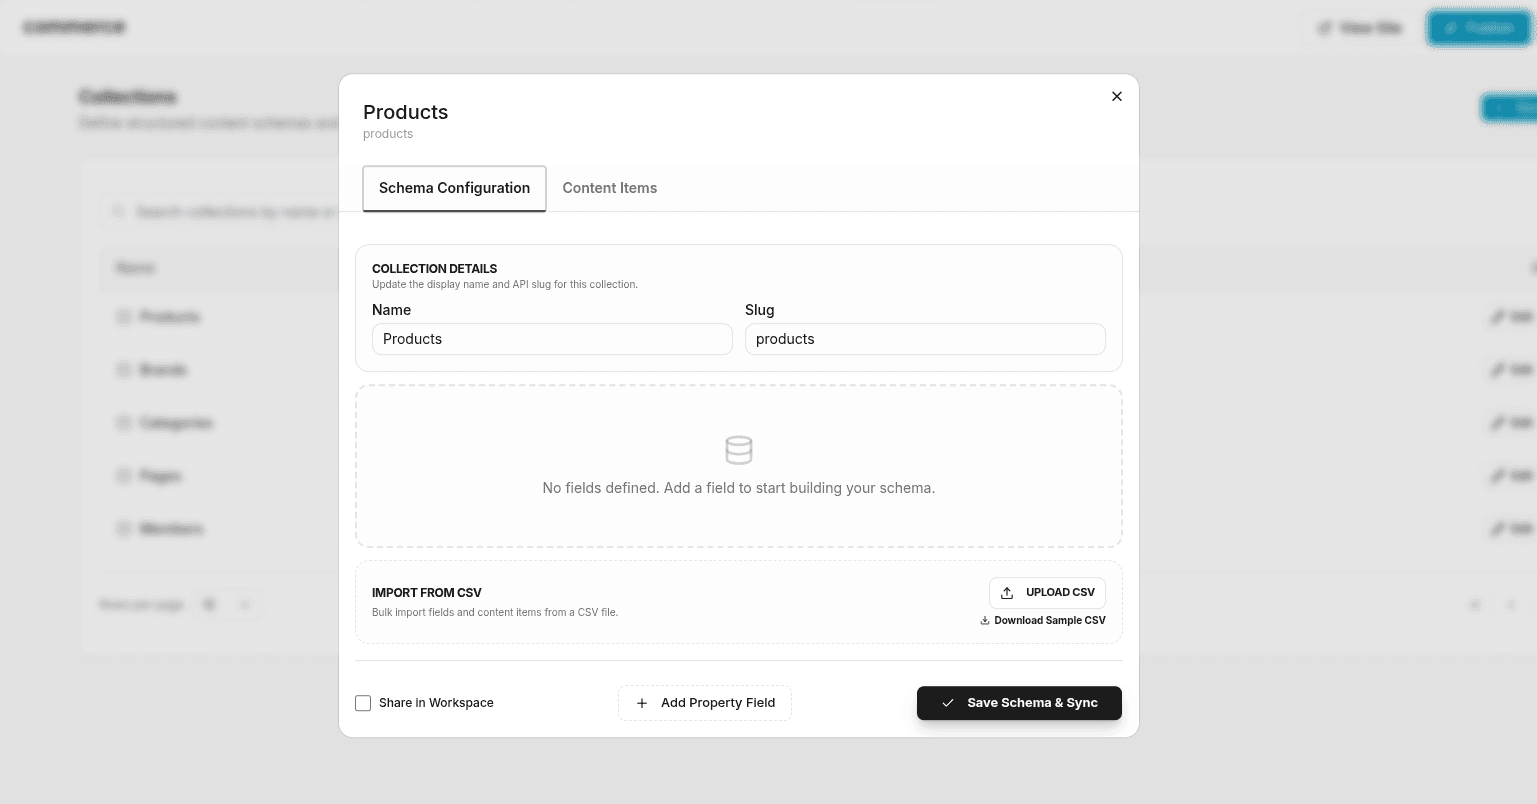
- Share in Workspace: Check Share in Workspace to make this collection (and its items) visible and selectable as a data source from every other site in your workspace, not just this one — useful for content like a company-wide team roster or a shared FAQ set. Editing a shared collection from any site updates it everywhere it's used.
- Click Save Schema & Sync at the bottom to commit your schema structure.
Each field row shows a grip handle for reordering, but drag-to-reorder isn't wired up yet — fields stay in the order you added them, regardless of dragging.
Importing Data via CSV
For rapid content migration, the Import from CSV section lets you import schema fields and entries in bulk:
- Click Download Sample CSV to view the format template.
- Structure your CSV headers using the format:
FieldName [TYPE](e.g.,Full Name [TEXT],Photo [IMAGE],Bio [TEXT],Order [NUMBER]). - Click Upload CSV to upload your
.csvfile. - Automated Media Migration: If your CSV contains external image URLs (e.g., from Unsplash or an external hosting provider), Blox automatically downloads those images, uploads them to your secure site Asset Library, and maps the new local URLs to your items.
Managing Content Items
Switch to the Content Items tab in the Collection Editor to populate your database:
- Adding Items: Click Add Item to create a blank record.
- Collapsible Rows: Items are rendered as collapsible rows labeled
Item 1,Item 2. The header shows a text preview of the first field to make scanning long lists easy. - Inline Editing: Expand a row to display input controls for each schema field.
- Media picker: For
Image URLfields, click Library (or Change, once a value is set) to open the Asset Picker. You can select an existing image, upload a new one, or clear the selection. A preview displays below the input. - Saving: Content edits save automatically when you click out of the input field or press
Enter. - Deleting Items: Click the trash icon on the item header.
- Pagination controls (10/20/50/100 items per page, First/Prev/Next/Last) and a "Showing X to Y of Z entries" line sit below the item list once you have more than a page's worth.
Unlike deleting a collection, deleting an individual item has no confirmation dialog — clicking the trash icon removes it immediately.
Binding Collections in the Editor
Collections don't have a dedicated "collection block" — instead, any section variant that already supports a repeatable list (testimonial grids, team grids, pricing decks, carousels, FAQ accordions, logo clouds, and more) can pull its items from a collection instead of manual entries:
Select a list-capable section on the canvas. In the right Inspector sidebar, find the Data Source (Lists) group and switch it from Manual to Collection.
Use the Select Collection dropdown to choose one of your site's collections (or a workspace-shared one from another site).
In the Field Mapping panel, map each placeholder (shown as Unmapped until set) to one of your collection's fields by name — no need to type API keys by hand. The canvas updates immediately as you map fields.
Individual, non-list fields can also bind to data — click the small database icon next to a field to bind it to a single Global Variable or one collection item's value. This is a separate, finer-grained binding mode from the list binding above. See Editor Blocks and Editor Overview for the full binding walkthrough.
Managing Collections from the Page Editor
You don't have to leave the canvas to manage your CMS data: click the CMS button in the editor's top toolbar to open CMS Data Management, a modal with the same Collections / Variables / APIs tabs.
This in-editor panel covers the same core schema and item editing, but isn't identical to the Site Management panel — button labels differ slightly (Create New Collection, Add Field to Schema), field types are labeled Image and Link instead of Image URL and Link URL, and it has no CSV import or field-reorder handle.
Related
- Editor Blocks — How field binding works across all editor blocks, including Global Variables.
- Blog — TDC's other built-in content system, purpose-built for long-form articles instead of structured records.
- Feature Access — Collection and item quotas by plan tier.